We present here three workshops showing how to come close to a given sound taken from several music styles.
Although it is impossible to reproduce exactly the original recording, we show how Pianoteq makes it possible to capture its colour, its atmosphere.
Rather than going into all the details, we concentrate here on the main stages, the most important being the order in which the settings are applied.
The changes in global settings need Pianoteq Standard while the note per note changes need Pianoteq PRO.
This workshop was prepared with the D4 from Pianoteq version 4, but of course the same technique can be applied to other pianos.
Important: in order to capture the finest nuances, a good audio setup is needed to listen to the following examples.
Workshop showing how to come close to a given sound taken from a famous standard.
 Target recording
MIDI file
Target recording
MIDI file
This is the recording we want to simulate. For copyright reasons, we present here only a short excerpt which is enough for our purpose.
 Choosing a preset
FXP
Choosing a preset
FXP
The first thing to do is to select the preset that will serve as starting point. Nothing comes really close so we we select here the D4 Classical AB preset.
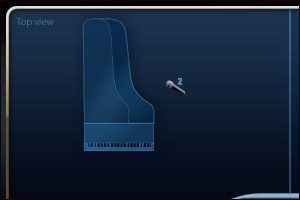 Microphone setting and reverberation
FXP
Microphone setting and reverberation
FXP
We start with microphone position. The original recording is almost mono so we place two microphones very close together (distance one centimeter). We select the Long Plate reverberation.
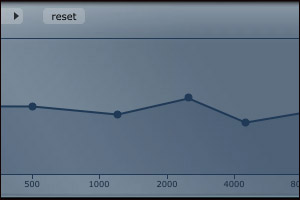 EQ, dynamics, hammer hardness
FXP
EQ, dynamics, hammer hardness
FXP
We now adjust equalizer, dynamics, volume and hammer hardness. Because the original recording is highly compressed, we reduce the dynamics to 15 dB. We increase the hammer hardness, and adapt the EQ to the recording by increasing the 2500 Hz range and reducing the 4000 Hz range.
 Tuning and hammer noise
FXP
Tuning and hammer noise
FXP
We increase the unison width parameter by a factor no less than 3 to obtain a similar detuning as shown by the original recording. We also reduce the direct sound duration to come closer to the compression effect of the recording and we increase the hammer noise.
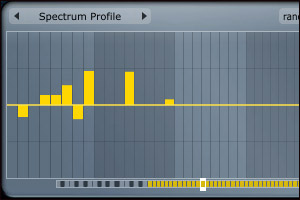 Voicing
FXP
Voicing
FXP
We now leave the global settings and work on the final voicing by adjusting the overtones note per note in the midle range. That can take a certain time, depending on how close we want to get.
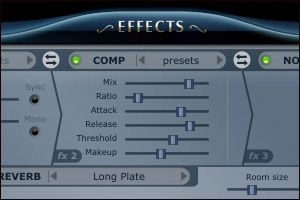 Mastering
FXP
Mastering
FXP
Finally we feel that the original recording has been somewhat compressed so we use the internal Pianoteq compressor to get closer to the target sound.